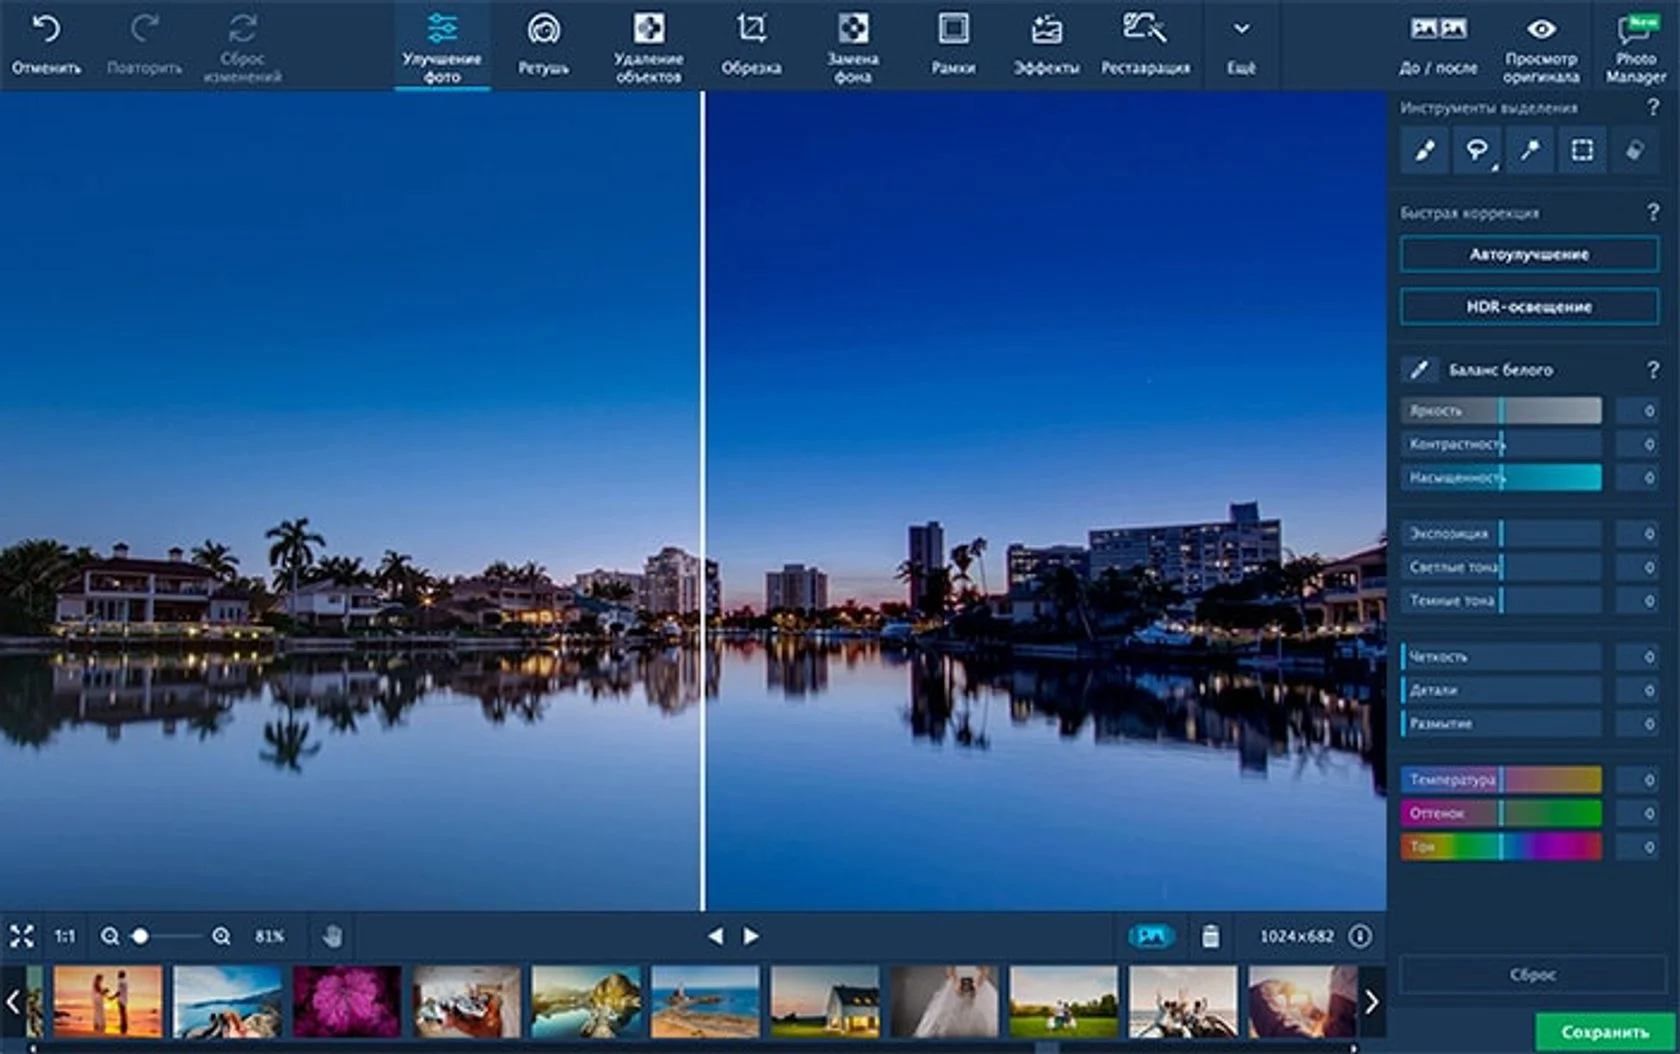
9 Best Photo Sharpening Software in 2025
Best Photo Sharpening Software: Have you ever felt disappointed when you opened your gallery only to find that a supposedly perfect shot lacks the vibrant detail you imagined? In today’s visually driven world, the clarity of your images plays a crucial role in storytelling, social media impact, and professional presentation.
Whether you’re a hobbyist seeking to capture memories with precision or an experienced photographer striving to elevate your portfolio, understanding photo sharpening can revolutionize your edits. Photo sharpening hones your pictures by enhancing edge contrast and detail, transforming soft images into crisp masterpieces. In this guide, you’ll learn what photo sharpening is and why it matters.
We will uncover the science behind edge detection, explore common pitfalls in the sharpening process, and introduce you to nine of the best photo sharpening software available in 2025. By the end of this guide, you’ll have actionable insights and a tailored roadmap for choosing the ideal tool for your creative workflow, all presented in a clear, user-first format. Get ready to amplify the impact of every pixel and bring your images to life with crystal-clear brilliance.
What Exactly Is Photo Sharpening (And Why Do Your Photos Need It?)
Even the most technically sound cameras and lenses can sometimes produce images that seem a little soft. Photo sharpening is the meticulous process of boosting the contrast along edges within an image, thereby creating the illusion of clearer detail. Think of it as fine-tuning a musical instrument; the adjustment is subtle, yet it makes the final performance resonate.
When your camera records an image, technologies like anti-aliasing filters and sensor limitations often produce a slight softness. Sharpening rectifies this by applying contrast enhancement along boundary lines, accentuating textures and details that might otherwise be lost.
This method hinges on algorithms such as the Unsharp Mask. Despite its name, the Unsharp Mask technique looks for differences in pixel brightness, essentially finding the edge and then brightening one side while darkening the other.
As a result, your subject pops from the background with more defined lines and textures. However, remember that photo sharpening does not create new detail; it merely refines what is already present. Sharpness is particularly critical in print formats and high-resolution displays, where every nuance matters.
Without sharpening, images may look flatter and less engaging, especially when viewed at full resolution. In essence, understanding and implementing proper sharpening elevates what could be ordinary visuals to professional-grade imagery, making every shot count.
Before You Sharpen: Key Concepts & Common Pitfalls
Before diving into the world of sharpening tools, it’s vital that you familiarize yourself with the key concepts and potential pitfalls of the process. Knowing the basics will empower you to use sharpening adjustments wisely and avoid common mistakes that can transform your image into an over-processed mess.
Understanding Sharpening Controls
Sharpening tools generally come with four main controls that you need to master:
- Amount/Strength: This slider determines the intensity of the sharpening effect applied. A higher amount can enhance detail dramatically, but excessive use may lead to unnatural artifacts.
- Radius: Determines the breadth of the adjustment zone around the edge. A small radius targets fine, delicate details, while a larger radius affects a broader area, emphasizing more pronounced textures.
- Threshold/Detail: This control dictates which parts of your image will be sharpened. It protects smoother regions and suppresses the enhancement of digital noise, ensuring that the sharpening only enhances true edges.
- Masking: One of the most crucial tools, masking lets you apply the sharpening effect selectively so that parts of the image, like skin or smooth backgrounds, remain untouched for a natural look.
The Danger Zone: Avoiding Common Sharpening Mistakes
- Over-Sharpening: Applying too much sharpness creates halos or light outlines around objects, making the image look artificial.
- Amplifying Noise: Sharpening can exaggerate unwanted digital noise, turning subtle grain into distracting artifacts.
- Ignoring Output Medium: Sharpening requirements for print, large-scale displays, or online viewing differ significantly. Always tailor the sharpening intensity to your final output.
- Premature Application: Always apply sharpening near the end of your editing workflow and sharpening before other adjustments like noise reduction can lock in imperfections.
Types of Sharpening in Your Workflow
- Capture/Input Sharpening: This is done within your camera or RAW processing software and serves as a baseline correction for inherent softness.
- Creative Sharpening: It Allows selective sharpening during post-processing, emphasizing specific parts of your image to draw attention.
- Output Sharpening: Adjusted according to the intended viewing medium, output sharpening ensures that prints or digital displays render perfectly sharp images.
Armed with knowledge of these essential controls and pitfalls, you’re ready to harness the full power of photo sharpening, and it all starts with choosing the right tool.
Top 9 Best Photo Sharpening Software in 2025
Choosing the correct sharpening software is a game-changer. The best option depends on your specific needs, from detailed control and AI-driven automation to seamless integration into your existing workflow. Let’s explore nine outstanding photo sharpening tools with unique features, pros, and cons.
1. Topaz Sharpen AI (Dedicated AI Powerhouse)
Topaz Sharpen AI harnesses the power of artificial intelligence to transform soft or blurred images into sharp, high-quality works of art. By detecting different types of blur, whether from camera shake, motion, or slight focus issues, the software intelligently applies targeted sharpening to deliver crisp detail where it matters most.
With a user-friendly interface and deep customization options, Topaz Sharpen AI streamlines your editing process. This specialized tool is perfect for photographers seeking to rescue challenging shots and achieve outstanding clarity without compromising natural tones.
Key Features:
- AI-driven analysis to distinguish between motion, focus, and softness blur.
- Multiple sharpening modes for tailored improvements.
- Advanced selective masking for precise, localized adjustments.
- Batch processing support for processing large collections.
- Seamless integration as a plugin with popular editing platforms.
Pros:
- Exceptional detail recovery from problematic images.
- It Simplifies complex sharpening tasks using artificial intelligence.
- Offers targeted corrections that preserve natural textures.
Cons:
- Performance may lag on older hardware.
- Subscription or one-time purchase cost may be a drawback.
- It Requires an additional processing step in your workflow.
2. Adobe Lightroom / Lightroom Classic (Integrated Workflow Standard)
Adobe Lightroom and Lightroom Classic are comprehensive photo management and editing solutions that have long been trusted by professionals and enthusiasts alike. With an intuitive interface and an impressive suite of editing tools, Lightroom includes a powerful Detail panel featuring Amount, Radius, Detail, and Masking sliders for precise sharpening.
Integrated directly into a non-destructive workflow, Lightroom allows you to preserve your original image data while working creatively. It offers versatility for quick adjustments and detailed refinements, making it an essential tool for serious photographers.
Key Features:
- Detailed control via the dedicated Detail panel.
- Non-destructive, layer-based editing workflow.
- Integrated noise reduction alongside sharpening tools.
- Powerful masking features for selective adjustments.
- Cloud-based synchronization across all devices.
Pros:
- User-friendly interface familiar to many.
- Versatility is suitable for both beginners and advanced users.
- Seamless integration with the Adobe ecosystem.
Cons:
- Requires an Adobe subscription, which may be costly.
- Standard sharpening is not AI-driven.
- A learning curve exists for mastering advanced features.
3. Luminar Neo (AI-Enhanced Editing Platform)
Luminar Neo combines cutting-edge AI technology with intuitive editing tools to deliver an exceptional photo sharpening experience. The software features a classic Sharpen tool alongside innovative AI modules like Structure AI, which intelligently refines edge detail and texture.
With a modern, user-friendly interface and the flexibility to operate as a standalone application and a plugin, Luminar Neo is designed for users who want high-quality results with less manual effort. Its adaptable framework allows creative photographers to effortlessly enhance clarity while preserving the natural look of their images.
Key Features:
- AI-powered Structure tool for intelligent detail enhancement.
- Traditional slider controls for manual sharpening adjustments.
- Dual functionality as a standalone program or plugin.
- Rapid processing speeds with real-time preview.
- Versatile editing environment supporting various file formats.
Pros:
- Simplifies advanced editing with intelligent automation.
- Consistently high-quality sharpening results.
- It is Flexible usage that integrates into diverse workflows.
Cons:
- AI-generated adjustments may occasionally require manual refinement.
- Available under subscription or one-time purchase models.
- Some advanced manual controls may be less refined compared to specialized software.
4. Adobe Photoshop (The Power Editor’s Choice)
Adobe Photoshop is the benchmark for professional image editing, boasting an extensive array of advanced sharpening tools that deliver unparalleled precision. With features such as the Unsharp Mask, Smart Sharpen, and High Pass filter, Photoshop allows you to tailor every detail to perfection.
Its layer-based, non-destructive workflow provides immense creative flexibility for editors who demand full control over the sharpening process. While the learning curve can be steep, Photoshop’s comprehensive toolset and consistent updates reinforce its status as the go-to choice for professionals around the globe.
Key Features:
- Unsharp Mask, Smart Sharpen, and High Pass filter tools.
- Fully layered, non-destructive editing environment.
- Extensive selection and masking options.
- Integration with Adobe Camera Raw for streamlined workflow.
- Customizable workspaces tailored to user preference.
Pros:
- Ultimate control over intricate sharpening parameters.
- Industry-standard with consistent innovation.
- Ideal for complex edits and high-resolution images.
Cons:
- Requires significant learning, especially for beginners.
- Subscription models can be expensive.
- Overkill for users seeking quick and simple adjustments.
5. Capture One Pro (Professional RAW Editor Alternative)
Capture One Pro is a premium raw converter and editing solution celebrated for its exceptional colour accuracy and meticulous detail rendering. Its sharpening tool offers full control with adjustable parameters such as Amount, Radius, Threshold, and Halo Suppression.
Capture One Pro’s advanced layer and masking capabilities allow you to apply selective sharpening precisely where needed. Favoured by studio professionals and tethered shooters, this software delivers far beyond basic corrections, ensuring that every detail in your high-resolution images is honed to perfection.
Key Features:
- Comprehensive sharpening controls, including Halo Suppression.
- Outstanding RAW processing coupled with exceptional colour fidelity.
- Robust layer and selective masking functionalities.
- Optimized for tethered shooting in studio environments.
- Customizable workspace tailored for professional workflows.
Pros:
- Exceptional detail and fine-tuned control over image sharpness.
- It is ideal for high-end RAW processing and colour management.
- Trusted by professionals for consistent, high-quality results.
Cons:
- Higher upfront costs or subscription fees.
- Complex interface that may overwhelm beginners.
- There is a demand for system resources and modern hardware.
6. GIMP (The Free & Open-Source Powerhouse)
GIMP (GNU Image Manipulation Program) offers a powerful, free, and open-source platform for image editing that rivals many commercial applications. With a rich set of tools, including the Unsharp Mask, Laplacian Sharpen, and enhanced plugin support like Wavelet-Sharpen, GIMP empowers users to refine image details without any cost.
Its robust community continually contributes to new features and plugins, ensuring that GIMP remains a flexible solution for users on various operating systems. This makes it an ideal choice for enthusiasts and professionals on a budget.
Key Features:
- Comprehensive array of sharpening filters and plugins.
- Completely free and open-source software.
- Cross-platform compatibility (Windows, Mac, Linux).
- Highly customizable with community-created plugins.
- Regular updates and active user support.
Pros:
- Zero cost while offering powerful image editing capabilities.
- Extensive customization and flexible toolsets.
- Active community support enhances functionality.
Cons:
- The user interface can be less intuitive compared to commercial alternatives.
- Advanced features may require the installation of additional plugins.
- The steeper learning curve for users accustomed to streamlined apps.
7. VanceAI Image Sharpener (Online AI Solution)
VanceAI Image Sharpener is an innovative online tool that leverages artificial intelligence to quickly and efficiently enhance image detail. Designed for ease of use, it allows you to upload your image, choose your desired sharpening intensity, and let the AI do the rest.
The web-based interface makes it accessible from any device, ensuring you get sharp, refined images in minutes without installing any software. VanceAI delivers a powerful combination of speed, simplicity, and advanced technology for instant improvements.
Key Features:
- AI-powered sharpening for automatic, precise adjustments.
- Intuitive online interface with minimal setup.
- Adjustable intensity settings for customized outcomes.
- No installation is needed, accessible from any device.
- Rapid processing for immediate sharpness enhancement.
Pros:
- Extremely user-friendly and accessible online.
- Fast results with minimal technical knowledge required.
- Free trials or limited free access allow you to test its capabilities.
Cons:
- Requires a reliable internet connection.
- Limited manual control compared to desktop alternatives.
- Higher resolution outputs and full features were available only on subscription.
8. Fotor (User-Friendly Online & Desktop Editor)
Fotor is an accessible photo-editing platform available both online and as a desktop application. It is designed for quick and effortless editing. Its sharpening tool and other basic enhancement features allow you to improve image clarity with a simple slider interface.
While it doesn’t offer the exhaustive control of specialized software, Fotor provides reliable adjustments for everyday photo editing needs. The intuitive, clean design makes it ideal for beginners and casual users who want to enhance their images without diving into complex menus.
Key Features:
- Intuitive sharpening slider for immediate adjustments.
- Multi-platform availability as an online tool and desktop app.
- Additional editing features like brightness, contrast, and saturation.
- User-friendly interface perfect for beginners.
- Free version available with optional premium upgrades.
Pros:
- It is ideal for users seeking a simple, quick edit.
- The minimal learning curve with a straightforward interface.
- Accessible across different devices and platforms.
Cons:
- Limited advanced features compared to pro software.
- The free version includes advertisements and some restrictions.
- Not suitable for detailed, high-fidelity professional edits.
9. Pixlr (Capable Online Editor Suite)
Pixlr is a versatile, browser-based photo editing suite that caters to users with both basic and advanced editing needs. Offering two distinct versions, Pixlr X for streamlined, quick edits and Pixlr E for more sophisticated control, this tool provides a reliable sharpening filter that enhances image clarity directly in your browser.
Its accessibility without the need for installation, coupled with a range of customizable options, makes Pixlr a convenient solution for users seeking a balance of ease and advanced functionality in an online format.
Key Features:
- Dual-mode editing: Pixlr X (simple) and Pixlr E (advanced).
- Browser-based access across multiple devices.
- Customizable sharpening filter integrated into the editor.
- Includes additional tools for overall photo enhancement.
- A free version is available, with premium upgrades for advanced functionality.
Pros:
- Convenient and easily accessible with no installation.
- Provides both basic and advanced editing options.
- The free version offers a decent range of features.
Cons:
- Requires a stable internet connection for optimal performance.
- Advanced features may be less powerful compared to dedicated desktop software.
- The free version displays ads and has certain limitations.
How to Choose the Right Photo Sharpening Software for You
Selecting the best photo sharpening software depends on your unique needs. Here are some factors you should consider:
- Budget: Determine whether you prefer a free solution like GIMP or Pixlr, a one-time license, or a subscription-based model like Adobe Lightroom.
- Skill Level: Advanced photographers may require the intricate controls available in Photoshop, Capture One Pro, or Topaz Sharpen AI.
- Workflow Integration: Consider whether you need software that integrates seamlessly with your other tools (e.g., Lightroom within the Adobe ecosystem) or a standalone application that suits your purpose.
- Platform: Choose software compatible with your operating system (Windows, Mac, Linux) or opt for an online tool if you need flexibility.
- AI vs. Manual Control: Decide whether you prefer automated adjustments with AI-driven tools or the manual precision offered by traditional applications.
- Output Needs: Evaluate whether your end product is meant for print, digital display, or web use. This will influence the sharpening intensity and approach.
By surveying these factors, you can narrow down the software choices and test a few options to see which best aligns with your creative vision and technical requirements.
Pro Tips for Perfectly Sharp Photos Every Time
Achieving flawless sharpness in your images is both an art and a skill. Here are some expert recommendations to ensure your photos remain naturally crisp:
- Apply Sharpening Last: Sharpening is one of your final editing steps after noise reduction and colour corrections.
- Zoom In to 100%: Evaluate your image at full resolution to assess the sharpening effect accurately.
- Use Masking Techniques: Leverage masking tools to limit sharpening to areas most benefit from enhanced edge contrast while preserving smoother regions.
- Maintain Subtle Adjustments: Aim for a natural look. Reduce the intensity if the effect appears overly pronounced or creates halos.
- Tailor to the Subject: Adjust the sharpening settings based on the subject matter; landscapes can often handle higher intensity, whereas portraits require a softer touch.
- Consider the Output Medium: Different media (print versus screen) may require varied levels of sharpening. Tailor the final adjustments accordingly.
- Combine with Noise Reduction: If your image contains digital noise, reduce it before applying sharpening to prevent unwanted artifacts.
- Experiment and Compare: Don’t hesitate to try multiple tools and settings. What works on one image may need fine-tuning on another.
Each tip enhances overall clarity without compromising the natural integrity of your photo, ensuring that your edits remain effective and artistically pleasing.
Conclusion
In digital photography’s intricate realm, mastering photo sharpening is an essential step toward transforming ordinary images into visual masterpieces. By understanding the underlying principles ranging from edge detection to selective masking, you can apply the right amount of enhancement to each photograph.
Whether you opt for the cutting-edge AI of Topaz Sharpen AI, the comprehensive workflow of Adobe Lightroom and Photoshop, or even a robust free solution like GIMP, the correct tool will empower you to rescue subtle details and bring clarity where it matters most. A thoughtful approach to sharpening not only accentuates textures and edges but also preserves the natural quality of your images.
Remember, the key is subtlety and precision. Experiment with different techniques, learn from each edit and gradually refine your process until each image truly shines. With the right software and these expert tips, your imagery will captivate with exceptional clarity, enriching your portfolio, social media presence, or professional projects. Embrace the journey toward perfection, and watch as every photograph evolves into a work of art.
We hope this comprehensive guide has unlocked new insights into the world of photo sharpening and equipped you with the tools and tips needed to enhance your creative vision. Now it’s your turn to dive into one of these top sharpening applications and experiment with your images.
Share your successes and challenges in the comments below, subscribe to our newsletter for more expert tutorials and reviews, and join a community of fellow photographers dedicated to excellence. Elevate your photography today with clarity that truly speaks volumes!
Frequently Asked Questions
Can sharpening fix completely blurry photos?
No. Sharpening merely enhances the detail in an image; if a photo is severely out-of-focus, no amount of sharpening can recreate lost detail.
Does sharpening reduce image quality?
When applied correctly, sharpening improves perceived clarity. However, over-sharpening may introduce halos and accentuate noise, potentially degrading image quality.
What is the difference between Sharpening, Clarity, and Texture adjustments in Lightroom?
Sharpening focuses on reinforcing fine edge contrast. Clarity boosts mid-tone contrast to add punch, while Texture adjustments enhance surface details without altering the overall structure.
Is AI-based sharpening always better than manual methods?
AI-based tools excel at automatically detecting different types of blur, but manual controls offer precision for specific adjustments. Your preference depends on the complexity of your image and your desired outcome.
How can I tell if I’ve applied too much sharpening?
Look for visible halos, unnatural edge outlines, or an overly crisp appearance. A natural image preserves its organic look while retaining enhanced detail.
What is photo sharpening software, and why is it important for my images?
Photo sharpening software is a digital tool that enhances edge contrast in your photos, making them appear sharper and more defined. By emphasizing fine details, it compensates for the slight softness caused by camera limitations or lens imperfections. Whether you’re using premium options like Adobe Photoshop or more accessible apps like Fotor, this software is critical in improving overall image quality. Effective photo sharpening software helps ensure your visuals are engaging, whether digitally or in print.
How does AI-powered photo sharpening software differ from traditional manual sharpening methods?
AI-powered photo sharpening software employs advanced algorithms to automatically detect and correct blurred regions and soft edges, streamlining the editing process. Unlike traditional manual sharpening, which depends on adjusting sliders such as Amount, Radius, and Threshold, AI-driven tools like Topaz Sharpen AI or Luminar Neo analyze your image, apply precise enhancements, and save valuable time. This automation delivers consistent, high-quality results while still allowing manual control, ensuring that photo sharpening software meets the needs of both novice and experienced editors.
Are there high-quality free photo sharpening software options available?
Yes, several free photo sharpening software options provide impressive outcomes without financial commitment. Tools such as GIMP and Pixlr offer robust sharpening filters and adjustable parameters to enhance image quality effectively. Although these free solutions might lack some advanced features in premium software like Adobe Photoshop, they still deliver reliable results for beginners and budget-conscious photographers. With free photo sharpening software, you can improve edge definition and overall clarity while exploring essential editing techniques.
How do I choose the best photo sharpening software for my workflow?
Selecting the best photo sharpening software depends largely on your editing style, technical skill, and specific needs. Evaluate options by considering user interface, available sharpening controls (e.g., Amount, Radius, and masking), and integration with other editing tools. For professionals, comprehensive solutions like Adobe Photoshop, Lightroom, or Capture One Pro are ideal, while beginners prefer the simplicity found in apps like Fotor or Pixlr. Ultimately, the right photo sharpening software should complement your workflow and deliver consistent, high-quality enhancements.
Can photo sharpening software fix completely blurry or out-of-focus photos?
Photo sharpening software enhances existing detail by boosting edge contrast and clarifying textures; however, it cannot fully fix severely blurred or out-of-focus photos. Advanced tools like Adobe Photoshop or Topaz Sharpen AI are effective at refining soft images and recovering subtle details, but they cannot create details where none exist. It’s often better to re-capture the subject or use specialized restoration techniques for heavily blurred photos. In summary, photo sharpening software is ideal for slight softness and minor focus issues, not for recovering entirely blurred images.
What key features should I look for when selecting photo sharpening software?
When choosing photo sharpening software, look for features that offer precise control over adjustment parameters. Essential elements include adjustable sliders for Amount, Radius, and Threshold, plus advanced masking options to apply effects selectively. AI-powered functions, as seen in Topaz Sharpen AI, can automate blur detection, while traditional solutions like Adobe Photoshop provide meticulous manual controls. Additionally, compatibility with your existing workflow and batch-processing capabilities is critical. These factors ensure that your chosen photo sharpening software consistently enhances image clarity and detail.
How does integration with other editing tools improve the use of photo sharpening software?
Integration with other editing tools enhances the overall efficiency of photo sharpening software by creating a seamless workflow. When software such as Adobe Lightroom, Photoshop, or Capture One Pro works with your broader editing suite, it allows you to easily transition from colour correction to fine-detail sharpening. This cohesive environment minimizes the need to switch between disparate applications, ensuring adjustments remain consistent and non-destructive. The smooth integration of photo sharpening software with other tools ultimately streamlines your creative process and boosts productivity.
How can I prevent over-sharpening when using photo sharpening software?
To avoid over-sharpening with photo sharpening software, it’s important to apply adjustments gradually and preview your image at 100% zoom. Utilize masking tools to restrict sharpening only to areas that benefit from enhanced detail, and carefully adjust sliders like Amount, Radius, and Threshold. Keeping your edits subtle helps prevent unwanted halos and noise. Whether you’re working in Adobe Photoshop, GIMP, or any other sharpening tool, monitoring the changes at each step ensures a natural, balanced look without creating an overly crispy image.
Which photo sharpening software is considered best for professional photographers?
Professional photographers typically gravitate toward photo sharpening software that offers advanced controls and reliable performance. Industry standards such as Adobe Photoshop and Lightroom are often preferred for their comprehensive toolsets and integration with broader editing workflows. Capture One Pro is highly regarded for exceptional RAW processing and detail enhancement, while Topaz Sharpen AI delivers innovative, AI-driven corrections for challenging images. These software options combine precise manual adjustments with sophisticated automation, making them ideal for professionals who demand consistent, high-quality, sharpening outcomes.
Is using photo sharpening software essential for both print and digital media?
Yes, photo sharpening software is essential for optimizing images across different mediums. Effective sharpening adjusts edge contrast and detail to meet specific output requirements, whether for high-resolution digital displays or crisp prints. Software like Adobe Lightroom, Capture One Pro, and others offer specialized output settings to ensure images retain clarity on various platforms. By tailoring adjustments to the final medium, photo sharpening software guarantees that your visuals maintain their impact, ensuring that every photo looks professionally refined and engaging regardless of its destination.




Sharpening can definitely make or break a photo, especially when preparing shots for print. I’m glad you touched on the common pitfalls it’s so easy to overdo it and end up with unnatural textures.
“What a fantastic roundup of photo sharpening tools! This guide is a lifesaver for anyone who’s ever struggled with blurry or lackluster images—I’ve definitely been there. Your breakdown of the science behind sharpening and the pitfalls to avoid is especially insightful. It’s refreshing to see such a thoughtful approach to enhancing photo details, not just for pros but for hobbyists like me too. Excited to test out a few of these recommendations—thanks for putting this together!”